8664 360th Street – St. Joseph, MN
Books I Recommend
Some of you may already know this, but I have my doctorate degree — and NOT in anything flower or business related. I love to read. I love to learn. Here are some links to my favorite resources. As I’ve said before, I do get a tiny commission if you order them through this link.
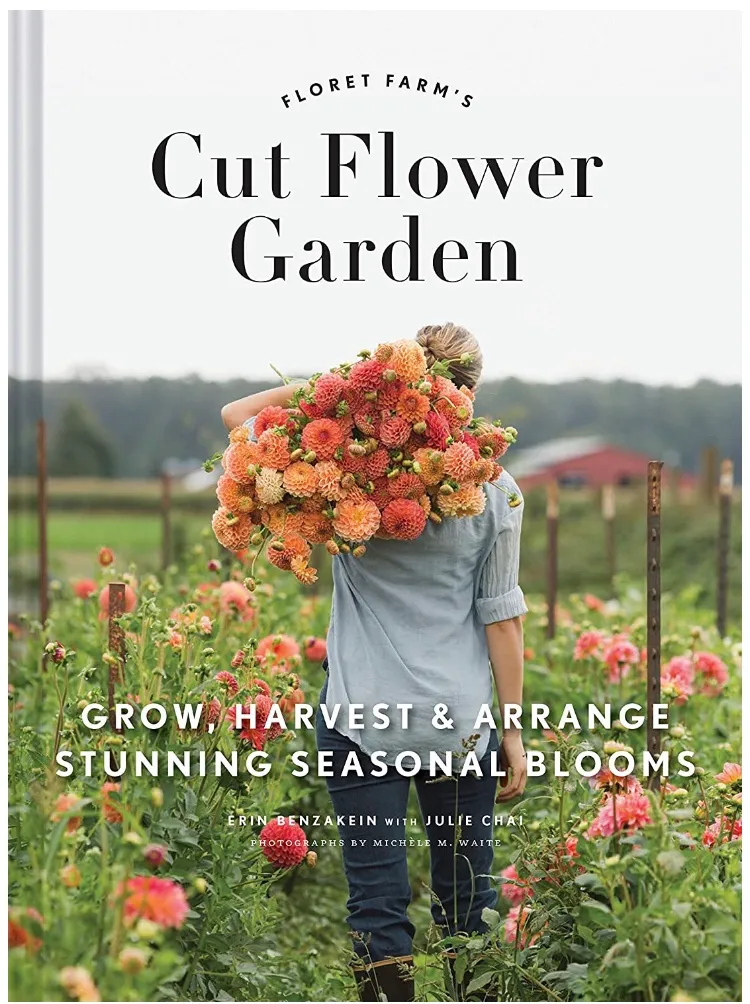
This book is absolutely where you need to start. Whether you’re doing a hobby backyard cut flower garden and want a fresh vase every week, or want a full scale commercial flower farm, this is what you need. I have read it about a dozen times and constantly look things up again.

This book is a great way to learn which flowers catch your eye and which ones you want to try growing. I love it breaks everything up by season, and the photos taken by Erin’s husband are inspirational to say the least.
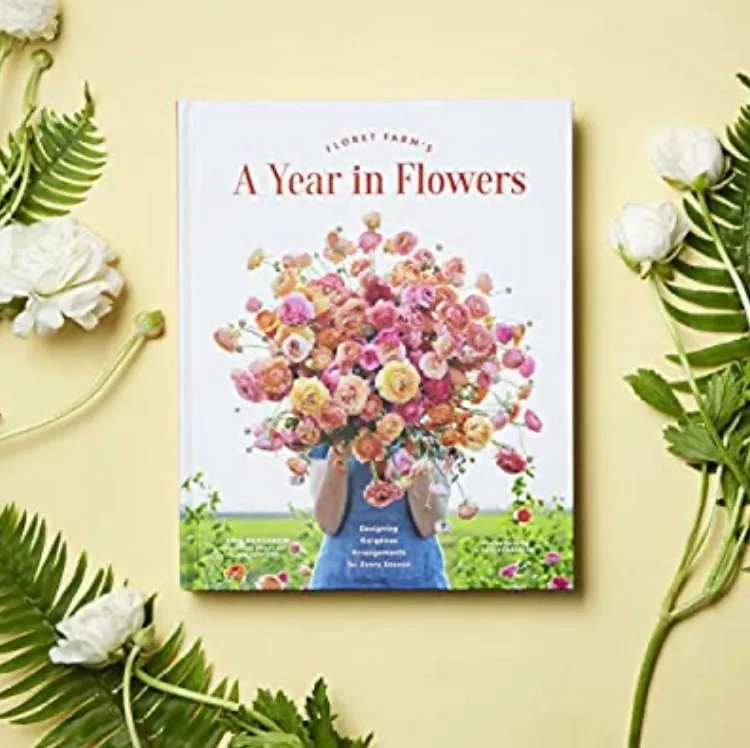
Erin’s second book ‘A Year in Flowers’ walks you through basic design principles. This is where I get so many ideas of using foliage and various greens found around my farm. Raspberries?! Boxwood?! Lets put those landscape bushes to work!
Seed Starting Supplies
By popular demand, I am linking the equipment I use get started growing my seeds. I love to share what I have learned and help others along the way. You can probably find something similar at your local hardware store if you want to do some digging. This is the method I will use to start over 1000 plants in my laundry room and office until (if/when) I ever take the leap of investing in a greenhouse. Additionally, you probably don’t need multiple shelves like I do if you’re only growing a few plants. I start them in a more humid area on heat mats, and then transfer to a shelving area with grow lights.
As I’ve said before, I do get a tiny commission if you order them through these links.
HUMIDITY TENT – I use a humidity tent for germinating the majority of my seeds. I only bottom water or mist them if the soil gets dry, and I try to avoid it after planting and before germination. If you live in an old farmhouse in MN like I do, humidity is a problem in the winter. Actually, lack of humidity is the problem. We run two industrial size humidifiers and it should work for up to 11,000 square feet. Our less than 2000 square foot house barely stays above 15% and we go through 8 gallons of water per day. Our house has zero insulation. That being said, I use a greenhouse “tent” to germinate the seeds that I start in February. By late March, the cold has usually passed and the air in the house is much more tolerable so it’s not a huge deal.

TENT LIGHTS – This strip kit is the perfect size for the growing tent I use linked above. The lights are zip-tied, but that’s ok because I switch shelves when they’re germinated. Once the plants sprout, you want to lower the lights 2-3″ above the plants to keep them from “reaching” for the lights.

HEAT MATS – I like this size of heat mat, and it can curve lengthwise to fit two shelves. Essentially, two heat mats can then fit all 4 shelves of the germination tent. About 50% of my seeds are started 4-6 weeks before last frost, so early April for my zone. My shelves will be FULL of plants by then, so for that month I take over my dining room table and the enormous heat mats work perfectly for this.

HEAT MATS – I like this size of heat mat, and it can curve lengthwise to fit two shelves. Essentially, two heat mats can then fit all 4 shelves of the germination tent. About 50% of my seeds are started 4-6 weeks before last frost, so early April for my zone. My shelves will be FULL of plants by then, so for that month I take over my dining room table and the enormous heat mats work perfectly for this.

ADJUSTABLE LIGHTS – These lights are wider than the shelves, but it’s not a huge deal if they hang off the sides a few inches. I love that they can be adjusted, because like I said, you need to keep them close to the top of the plant so they don’t grow “leggy” and reach for the plants.

TEMP & HUMIDITY GUAGE – If your house isn’t drafty and old and cold and dry like mine, it probably isn’t a huge deal to have this, but I like to know if my plants are sitting at 20% or 70%.

Free Seed Starting Guide
I have also attached a PDF file of everything I grew in 2020. Lots of updates to make in 2021, but this will get you started! I am in Zone 4B in Central MN.
Gardening with Kids
As I’ve said before, I do get a tiny commission if you order any products through these links.
Vidalia was originally gifted this for her December birthday, and was given another set around Christmas. The tackle box is great for storing, and I am amazed at her memory when she talks about these flowers. She is able to give them some real flower names (Snapdragons, Roses, Daisies), and makes up her own names for them as well (Faras, Cocos, who knows what else!) I think anything that keeps their wheels turning/thinking about the garden in the winter is a win.

This gardening kit is one that Vidalia loves to wear in the garden with me. I find plenty of rocks, twigs, and flower petals in the pockets of the apron but the best way to get them started is to get them interested.

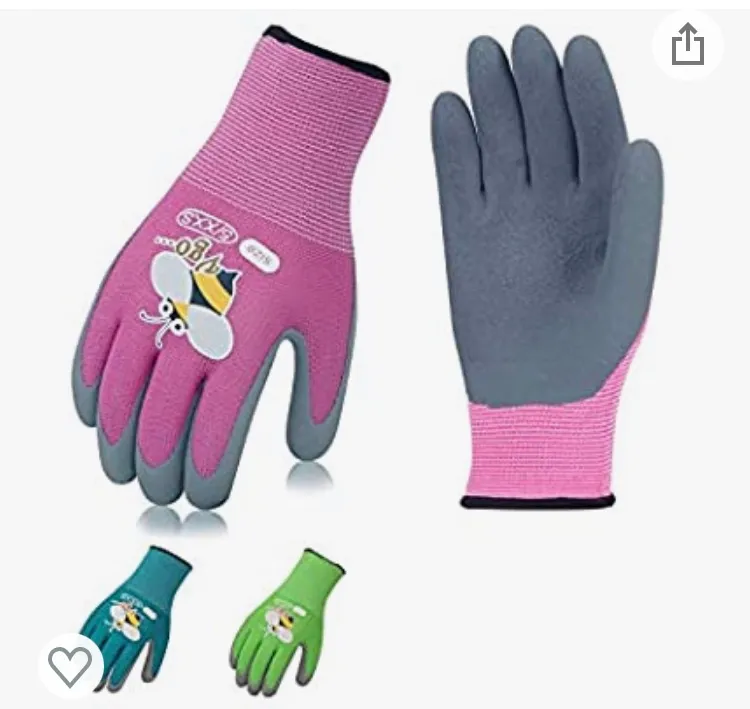
The play set above is great for fostering creativity, but in my own experience of parenting, the best way to get kids interested in something is by letting them jump in and get their hands dirty. However, nobody likes to pick dirt from underneath a preschooler’s fingernails, so get them some good gloves! These can be thrown into the wash pretty easily, and Vidalia says they don’t make her hands “so sweaty spaghetti”!
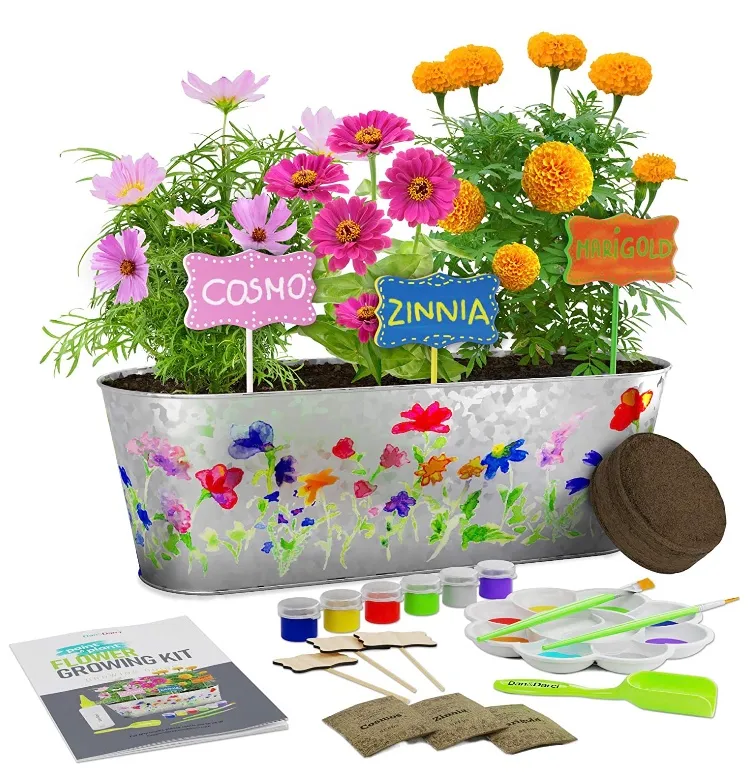
I grew up on a farm, and now live on one where I have multiple gardens for my child to play in. I forget that not everyone has that space at their disposal. This flower growing kit was given to my friend’s daughter as a gift to keep her occupied during the spring quarantine of 2020, and it’s the perfect size for a little deck, patio, or even living room window. Basically you can teach your child to have a love for gardening or become a crazy plant lady with a passion for indoor plants.
There are many great children’s books about gardening (and another coming soon HINT HINT), but I developed a love for Dr. Seuss thanks to my best friend, Nicki. “Unless someone like you cares a whole awful lot, nothing is going to get better. It’s not.” -Dr. Seuss

There are many great children’s books about gardening (and another coming soon HINT HINT), but I developed a love for Dr. Seuss thanks to my best friend, Nicki. “Unless someone like you cares a whole awful lot, nothing is going to get better. It’s not.” -Dr. Seuss

Flower Care
There are a few steps you can take to prolong the life of your fresh flowers.
Winter Sowing Tips
Winter sowing involves starting seeds in plastic containers and creating a mini greenhouse to protect them from the elements and save space from starting seeds indoors. It can also help your flowers get started (and bloom) earlier in the season.
You can do it with a variety of vegetables, but there are many flowers that can be winter sowed! Basically any flower that says to seed “as soon as ground can be worked” is a good candidate to be winter sown and is cold hardy.
I planted: Larkspur, Delphinium, Bells of Ireland, Foxglove, Green Mist, and Cerinthe.
Stay tuned for a few months to see how they turn out!
-In MN we have a wide window to winter sow
-Start in January so you don’t risk a warm spell to starting to germinate the seeds
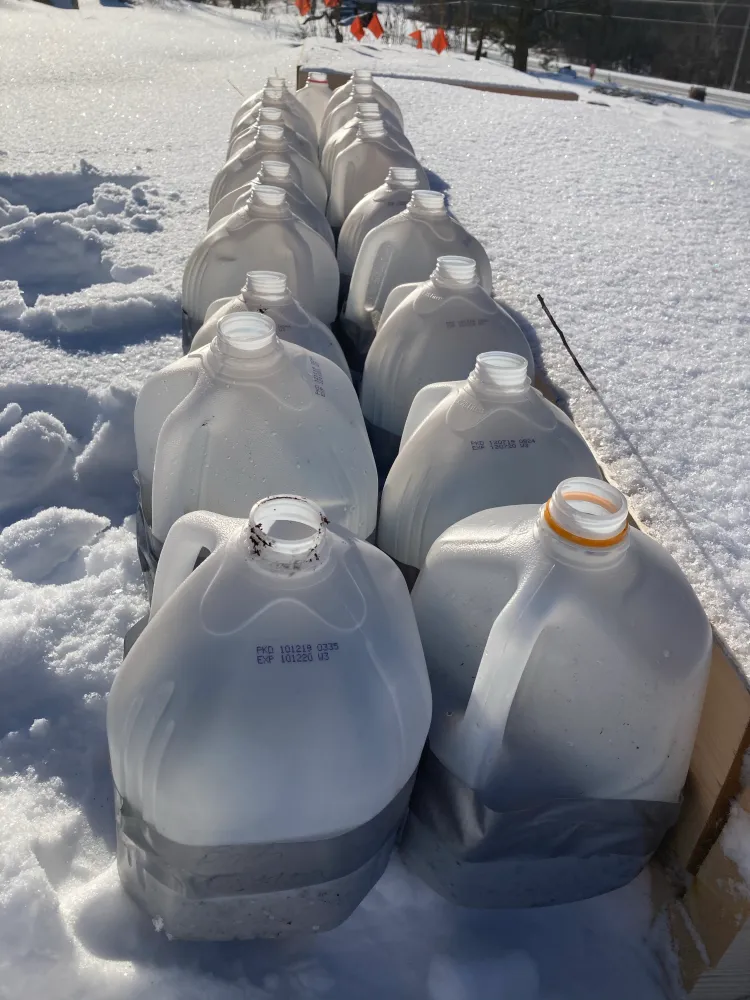
-Drill holes in the bottom for water drainage
-Cut the jug in half 1″ below the handle

-Dampen your potting soil
-It should be moist enough to stick together but not sopping wet

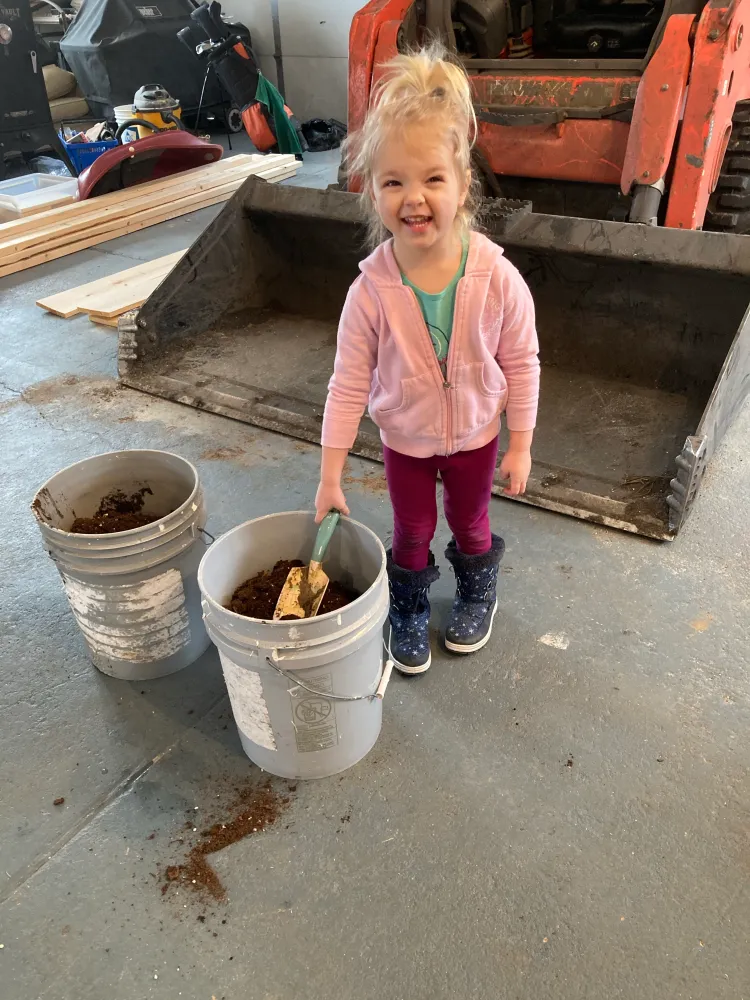
-Get a cute helper to stir it up
-Put the soil in the jugs
-Throw your seeds on top

-Label with a paint marker (a sharpie will fade)
-Use duct tape to close the jugs
-Keep the lids off (they need water and snow to get inside for moisture and air needs to escape)
-Place the jugs in a spot that will get the same amount of sun where you will transplant them
