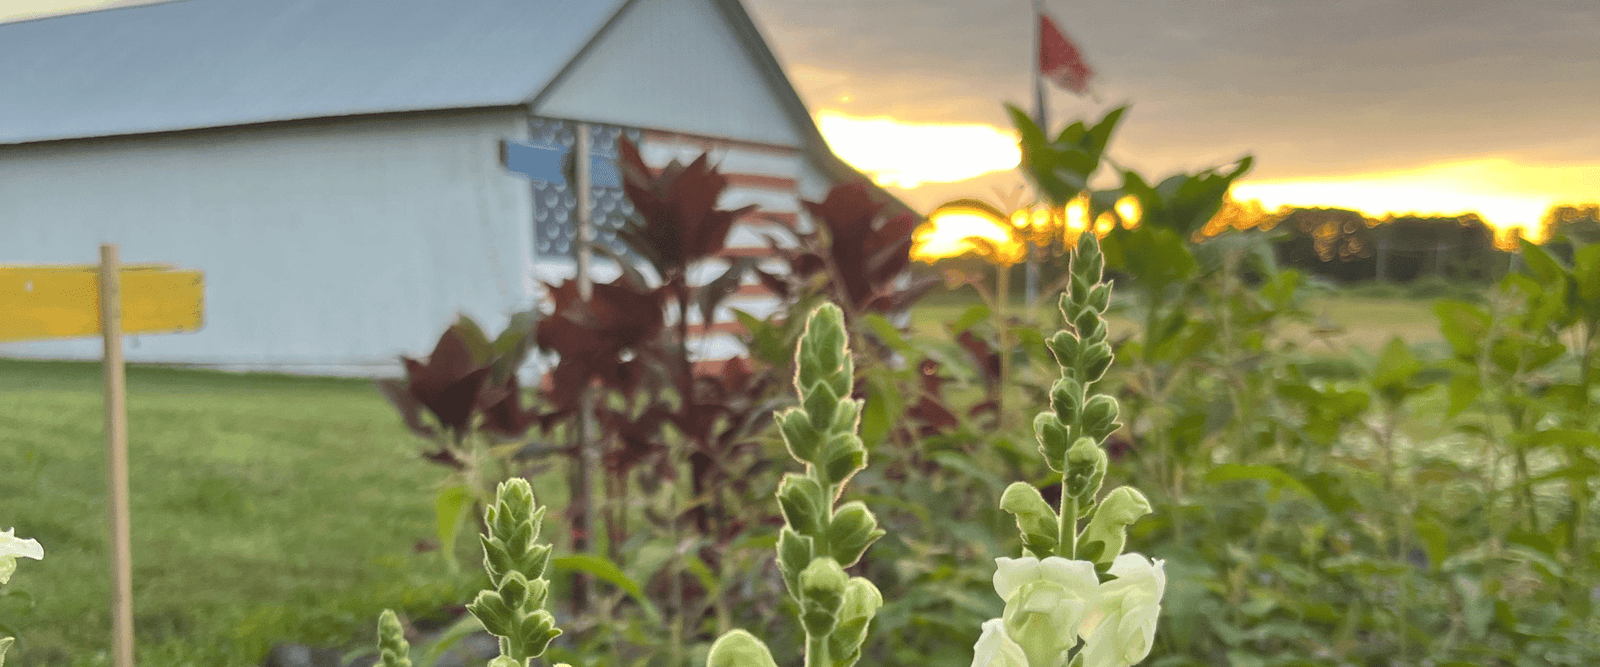
Welcome back to another Sunny Mary Meadow podcast/blog post. I am your host Liz Fiedler, and today I’m going to talk about “flower support” – essentially keeping them from toppling over. Where I live in Central Minnesota, it’s not windy. People think it’s windy here but trust me it is not windy. I grew up in Southwest Minnesota along the Buffalo Ridge. Whenever you see the National Weather Service talking about just this tiny little strip that is the eye of the blizzard all of the time, that’s where I grew up. It’s always SO windy. I don’t really know why … I heard one time that it’s like the center of the mountain ranges and the hills or something. I don’t really know, but there’s a reason they put all of the wind turbines down there in Southwest Minnesota – it’s because of how windy it is. In fact, when they get two inches of snow, there are ground blizzards where you cannot see … it’s white-out conditions. When I first moved up here to Central Minnesota, and school was canceled, I was like, “What do you mean, school is canceled? You can see for like three miles straight.” In Southwest Minnesota, visibility would literally be like three feet in front of us (or not even that far).
So, it’s just very different from what I grew up with as far as wind. It was awesome (that’s a sarcastic “awesome’) because I would spend 20 minutes curling my hair in high school and then step outside into a wind tunnel. So, anyway, it’s not as windy here. That being said, if you’re from around here, you may remember that last year in May, we got straight-line winds that were 90 miles an hour and wrecked a ton of buildings. So, I guess we do get wind, just not like they do in Southwest Minnesota.
Wind is just one of the reasons I want to talk about figuring out how to support your plants. There’s multiple reasons, but the end goal is that you want to have longer and straighter stems that are more usable in bouquets. If they’re growing sideways along the ground, then you’re gonna have this L-shaped snapdragon, or zinnia, or whatever it might be. You can’t use it like that, so you want longer & straighter stems. You also want to just get some airflow below the plants to help avoid diseases. When it’s on the ground, your leaves are always wet. Sometimes staking/flower support is needed in your landscaping flowers, in addition, to cut flower farming, like with peonies, for example.

We’re going to talk about five different ways of supporting your flowers. The main flowers I will use supports for are dahlias, stock, snapdragons, cosmos, and delphinium. Delphinium is new to me this year – I ordered a big tray of plugs of it, and then I have some that I started from seeds (but those are perennials). These all need support of some kind, otherwise, they’ll topple over. I don’t grow lupines, but they will need support as well if you grow them. Some people will use supports for their amaranth, but I find that it does fine on its own and sticks up straight just fine. I definitely don’t need to stake sunflowers – some people will corral them if they live in a really windy area, but I don’t have that problem. I’ve never had problems with my sunflowers leaning or toppling over, so I don’t bother with those. Honestly, it kind of depends on how moist the ground already is for the sunflowers for whether or not they’ll tip over if there’s a ton of rain.
One thing to keep in mind is that you want to put up the support before it’s necessary. So, when they’re like six to eight inches tall, that’s when you want to start adding your support system. You don’t want to wait until they’re two feet tall and starting to topple over. It can be much more difficult to get whatever method you’re using at that point. It’s also hard to get them to bend straight again after they’ve been growing curvy, plus you could break off stems or uproot them. So, it’s really important to do it when they’re under a foot tall, but I’d recommend it even before they are six to eight inches tall.

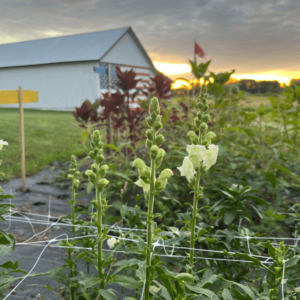
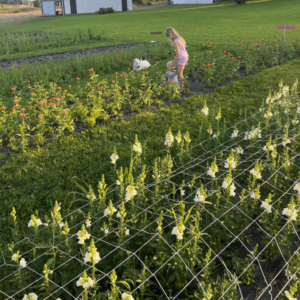
So, the first method of flower support that I’m going to talk about is support netting. This is the method I use most for flowers that branch off. This is what I use for lisianthus, snapdragons, zinnias, and delphinium. Here is the netting that I use. I just buy it off Amazon, because the shipping is free, and it’s about the same price as buying it elsewhere. You can buy it from Gardeners Workshop, Johnny Seeds, etc.- there’s a lot of different places you can buy it from. You can get it in either a mesh netting or a plastic netting. I use the plastic one, and I use it year after year. It just works really well for me, and it comes in like six-inch square spacing. So, what’s really nice about that is you can lay it on the ground. For my lisianthus this year, I will lay out the fabric and I will put the netting on top of it, and then I will actually burn the holes in the netting so that I know it’s exactly that six-inch spacing. It’s much closer than a lot of things that I grow where I do nine-inch spacing. So, I will use the netting as a grid to make sure that it’s one plant per square – whatever that ends up being.
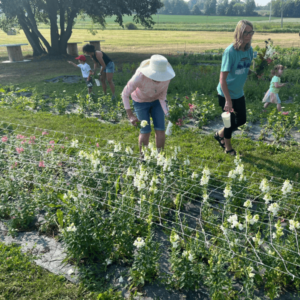
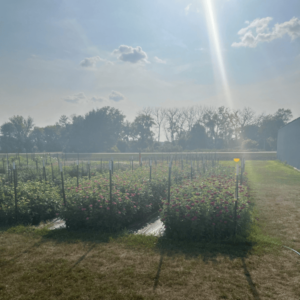
Again, the mesh (or the squares) works really well with plants with a lot of branches. I know some people use it for cosmos, but I’m going to give you a different example of a type of support to use for cosmos (what I use). Again, lisianthus, snapdragons, zinnias, and delphinium are what I use this square plastic netting for. It’s like four feet wide, and then there’s a little plastic square every six inches. At the end of your rows, you want to put some metal T-posts about four-feet wide. You put those in the ground at the two ends of the row and then unroll your netting for the whole distance. Then you’re gonna pull it tight at each end and have it so that it’s barely hovering above the plants. You want it maybe a foot off the ground when the plants are eight inches tall. It’s best if you can have two people do this so that it’s even, and you pull it tight along the sides as you’re going so that it’s suspended over the plants, and then the plants will actually grow through them. They’ll grow up through the holes. Again, you’ll want to do this when they’re about eight inches tall.

Sometimes for plants like my lisianthus, for example, I am going to plant some inside of my high tunnel and some outside. When I plant outside, which will probably be about 500 of the 2,000 I ordered, I will have two layers of netting. So, I’ll put two layers on there at once – one that I will plant in, and then the second one will be hovering above it. They’re such a premium crop, and they’re so great for my brides that buy buckets of flowers, and I just really want those stems to be nice and straight. They can get such a heavy canopy on top that one big wind will cause them all to fall if one part of them starts falling. So, two layers of netting outside and one layer of netting inside of the tunnel for those. I could maybe get by without netting them inside the tunnel, but then I would be scared to have the sides up very often. And if I don’t put the sides up, it gets so hot in there. It’s just hard to know. The netting is probably the most common one that you see flower farmers use.
The next one is staking, which will be mainly for your basic gardener/hobby gardener. This is best if you have a few flowers in your vegetable garden or if you have some flowers around your house that need staking. Essentially you just use wood, metal, bamboo, a T-post, or whatever it may be. I used some wood stakes that I bought at Fleet Farm – I think Fleet Farm, Menards, and Home Depot all carry them. You just pound the stake into the ground next to the stem. Then you use twine/string to tie it individually to the plant. So, you would use this for something like a dahlia, for example, which has a big base or a main trunk-like stem. Staking the individual flowers for cut flower farming when you have 500 of one flower is not going to be a good option. But, if you’ve only got 10 dahlias in your garden or whatever it may be, then I think it’s a really good option. Or if it’s some sort of plant in your landscaping that you want to stand upright, it would work great for that.

The next method is one that I used last year, but not super effective, and I need to do a better job of it, which is corralling. I’m going to use this for dahlias and cosmos this year. Cosmos will be a new flower for corralling this year for me. Basically, you build a fence, or a corral, around the perimeter of a bed. So, like a bed of dahlias, a bed of cosmos, etc., and you put bigger T-posts on the ends, and then like every eight feet or so, you put more, and then you’ll tie twine/string around the entire thing. Then you will put another layer about 12-to-18 inches above that. You could even do three layers if it’s a really tall plant. It just helps keep the plants on the inside, and they’re just kind of fenced in. I’m excited to do my cosmos this way. The first year I grew them, I had no problems with them toppling over, and then last year, it was a gigantic mess for whatever reason. It was terrible … I don’t even know how to describe it. They were just on the ground, growing sideways, and I could do nothing about it. So again, corralling is where there’s a big perimeter around them.
For my cosmos, I will still use landscape fabric even with the corral around them, but for my dahlias, I actually don’t put them in landscape fabric. I’ll have like a three-foot wide patch of dirt and compost, and then every 18 inches or so, I’ll plant two next to each other so they’re like a foot and a half apart down that row, and then I corral the whole thing around it. I have to weed probably two or three times in June, and then after that, the dahlias are blocking the sun, and the weeds really don’t come through because they’re not getting the sunlight, and they’re not able to sprout. So, then it’s just pulling a few weeds here and there. It works pretty well not to need to have to use the landscape fabric for the dahlias.
The next method is trellising. You will see this a lot in people’s landscapes – they have like a fancy little ladder, or I have one that’s like a door with an archway on it, and it’s made out of metal. It leans up against my house, and it’s cute. So that’s one way you can do it – buy some fancy pre-made thing. Or you can just get some tall posts, and you will basically put them maybe six feet apart, or however big your cattle panel is (if you use one). You could even make an archway – I’ve seen it where it’s like an archway that you can walk under, and then vegetables will just dangle underneath. You can also use chicken wire for trellising – so two posts and then chicken wire. Then plant something that can just climb up it. Clematis is a plant that works well with trellising. Other climbing vines, like sweet pea flowers and then a lot of vegetables like peas, tomatoes, etc., work well with trellising, too. I’ve never done it, but I’ve seen people do that, and they make this really cute archway to their vegetable garden where you walk under this tunnel of vegetables. I’m very outdoorsy, obviously, and I’ve got so much dirt on my fingernails right now, but I do not like spiders. With an archway of vegetables you walk under, I’d be like, “Oh, no thanks. I’m good. I don’t need to walk under an archway/rainbow of my food.”
Sweet peas are the one flower that a lot of people plant for trellising, and I would love to plant some just to look pretty in my garden at some point, but when I bought them before, they had like 6-inch stems so they didn’t work for me to make bouquets with. I know you can make them a lot longer, and they’re so pretty, and they smell so good, so maybe someday I’ll work on some sweet peas a little bit more. But for now, I’m good.
When trellising, it’s important to secure the plant with twine every couple of feet. Just kind of weave it in and out of the chicken wire, or the cattle panel, or the fancy $600 thing that you bought from Menards, or whatever it might be. Or if you’ve got a cool father-in-law, or a flower-farmer fiance, or someone that builds you stuff, you could ask them to build you a trellis. And then just be sure to secure the plants with twine every once in a while.
Then the last type of support I want to talk about is grow-through support. Basically, this is where they have the ability to just grow through it. This works well for peonies you are growing. Now remember, I don’t really have to support my peonies because I cut them before they bloom so they don’t topple over. But if you have them in your landscaping and let them bloom, they’ll fall across your sidewalk most of the time, especially with big, double varieties. This type of support is round in shape … Abbey has described it as like the cage of a grill. The holes are obviously a lot bigger, but then the plants can grow through them. There are like three or four stakes that kind of support it so that it hovers a little bit above ground. Or, you can use something like a tomato cage as a grow-through support. I actually have used tomato cages for some of my dahlias before. I did it the first few years just because I had about 30 tomato cages around here because Josh used to plant a ton of tomatoes for Bloody Mary mix and salsa. It actually works really well if you need to support certain dahlia varieties that you know always fall down, but some of them are fine, and you don’t want to corral them. Or maybe it was too late to corral them.
Again, with flower supports, you need to install most of these things before it’s too late. Otherwise, you’ll have a situation like I did like last year where I had one tomato plant, and it was just out of control. I don’t even know how to describe it. Brent went down to the garden and he’s like, “Why is it growing along the ground? I didn’t even know they did that.” I said “Yeah, well …” It was a little too late. I tried to tomato cage it, and then I ended up just using some wooden stakes and kind of caging it upward. Otherwise, your tomatoes are just going to grow along the ground, and then they rot, and it’s disgusting. So, we ended up just staking them upright.
So those are the five little supports that I use here on the flower farm. Abbey, do you have any questions or thoughts about supports?
Abbey: Okay, when it comes to staking things, I fly by the seat of my pants. I’m a novice gardener – I’ve been very clear and open about that. Last year my mom gave me a patio tomato. She’s like, “Here plant this.” This thing was like six inches tall when she gave it to me, and I didn’t think it was gonna get big.
Liz: Because it says patio, you think it’s gonna stay small.
Abbey: What do I know about growing tomatoes? Nothing. I can see into my neighbor’s kitchen from my house. I don’t have a yard for gardening and whatnot. So, she gives me this thing and she’s like, “Just make sure you stake it when you plant it.” And I’m like, “With what?” And she said, “You’ve gotta have scrap wood around there or something.” So, I just grabbed a piece of mop board that we had cut off and never put back on. Is that okay? Can you use treated things like that?
Liz: Um, I think it’s fine.
Abbey: Not ideal, probably?
Liz: Probably not ideal because you’re eating from it. But is the tomato touching it? Did it die? Did you die?
Abbey: Full disclosure – I never ate anything off of it. Because the second they would be ready to be harvested they would rot, and then the rabbits found them.
Liz: No, I think my gut’s saying it’s probably fine to use treated lumber to stake something, but I’m sure there’s gonna be someone that’s listening to the podcast or reading the blog that will be like, “Oh my God, there’s blah blah blah blah blah chemicals in that.” And I don’t know, I truly don’t know. It’s probably fine, but probably ideal not to use treated lumber.
Abbey: I’ll try to be more prepared this year when my mom gives me a tomato.
Liz: Yeah, so I’ll give you a tomato cage.
Abbey: Okay, perfect.
Liz: I’ve got multiple, so that I will give you a tomato cage. So, are there any flowers that you’ve used, like clematis? Or do you know what I’m talking about?
Abbey: Vaguely. I do know that my neighbors need to do something about their peony plant because the second it starts to bloom, the blooms are on the grass. So, they need to do something because the thing looks just so sad.
Liz: So, I’ve got Google pulled up, and I’m going to show you what a clematis looks like.
Abbey: Yeah, they’re super pretty!
Liz: I’m planning on getting some for the south side of my house, I think. I don’t know, my landscaping guy was supposed to get a hold of me today. Those vines climb, and they can actually really take off. Josh’s Aunt Judy has one that she’s got that’s to the top of one trellis, and then it actually kind of arches over to a different one, and it cascades down that one like it’s so long. Once they get older and you can cut them back or else they can just kind of take off where they left off. They’re fun, and they’re very pretty.
Abbey: Okay, so when I was growing up, I lived on eight acres of land, and my mom had a really great garden. I did not get her green thumb, unfortunately. But we had this little mini shed that was kind of in the shape of an outhouse that held all of our garden tools. And we had something very similar growing over the top of that. So, I wonder if it was clematis.
Liz: I bet it was. I bet it was. They do really well in Minnesota. I had one that Josh’s Aunt Judy actually gifted us for our wedding, but I don’t have it anymore. Davey was born in August, and then we got an early frost for us, and I just didn’t think about it in time. When I did, I was like, “Oh my gosh, we are tearing down the house at the beginning of April.” So, all of my plants that were around the house were lost. I never thought to dig them up that fall. I had all these irises, and there were some peony plants, too … not too many, but a couple. So that sucked because then the excavator came, and the ground was still frozen, and there was no saving anything. It really sucked that I lost those, but they’re just plants. I’m going to buy another clematis that looks just like the one Judy gave us – it was white with pink tips or white with pink on the inside. It looked kind of like a Stargazer lily. And you know what? That’s going to be like, “Oh, that’s like the one that Judy got us for our wedding. That’s what Judy got us for our wedding.”
Abbey: They’ll fill the void.
Liz: If you manifest it, it’s true. Is it really the one? Well, no, but it’s like the one, and it’s fine. That’s just how you got to do it sometimes when things have a sentimental value to them – plants die, things die. So, then you just buy another one just like it. My Christmas cactus is doing fine, but eventually, when it dies, which hopefully isn’t for like 10 years, I’ll just buy another one. I’ll be like, “Yeah, that’s Josh’s funeral cactus.” Yeah. It’s all you can do.
Abbey: The last thing I have is not a question, it’s more of a statement, and you should definitely go look this up. But if you’re into creative trellising and staking, there is a ride at Epcot in Walt Disney World called “Living With the Land” where they put you on a little boat-like thing, and then they run you through like all the greenhouses that they use to grow the flowers at Epcot for all their festivals, and all their vegetables, and all that sort of stuff. The way that they grow some of their fruits and vegetables via trellises and overhanging things is cool. They have zucchinis and cucumbers dangling from the ceiling. It’s just cool. So, if you can hop on YouTube and watch a ride through that, I think you will really enjoy it.
Liz: I think now Epcot just became a write-off. Right?
Abbey: It’s research!
Liz: It’s a field trip.
Abbey: You gotta see what they’re doing.
Liz: I gotta see it. Trellises … I’m researching about trellis.
Abbey: Just ride Living with the Land like four times. See if you can get a receipt from a cast member.
Liz: All right, there we go. So, there’s the next family vacation planned … I mean “work trip” planned. All right, well, let me know if you have any questions about staking or supporting your plants. Or if you’re out there in your garden, and you take a picture, tag Sunny Mary Meadow on Instagram or Facebook and let me see it. Let me see what you’re doing. And let me know if you have questions. I’m here to help.
Thanks for reading the Sunny Mary Meadow blog. If you like what you’re reading, please subscribe to the podcast and rate us. You can also find us on Instagram, Pinterest, and Facebook.
You can subscribe to our email newsletter below. We love to hear any podcast-related feedback at our email podcast@sunnymarymeadow.com, and all other inquiries can be sent to liz@sunnymarymeadow.com.