
I am excited to kick off the podcast with some very beginner gardening tips for growing your own cut flower garden. We will get more advanced in future episodes, but this is a great place to start.
I wrote an e-book last year on this topic, and there are many tips, including where to purchase seeds, spacing, tips for weed control, and a sample map of a 12’x5’ plot for all of these plants. You can purchase the book here if you want more details.
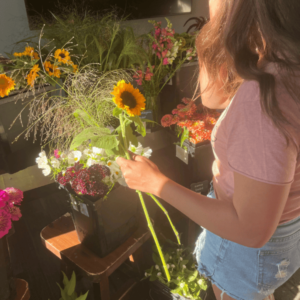
My target audience for the e-book was either a brand-new beginner to gardening or someone who has some gardening experience with vegetables but isn’t quite sure where to start with cut flowers. The goal is to have a bouquet every week in your house all summer long and maybe one or two to share with friends and neighbors. I wanted to focus on flowers that work well together in a bouquet but are also easy to plant. These are all flowers that can be directly sown, or you can literally place a seed right in the ground. You don’t need to start them early in trays and worry about transplanting them, keeping it very simple for beginners. Future blog posts and episodes will be a little more advanced and experienced, but I think it’s important to have one starting at the very beginner’s level.
If you already have a vegetable garden, you can designate a section of it to be your cut flower garden. Keep in mind, as I said in the trailer episode, cut flower gardens are not very pretty. If you’re planning to pick and cut the flowers, most of the time, you need to pick them as the flowers are barely opening. This means that your cut flower garden will look like a lot of green leaves and not many blooms. If you pick them too late, they can lose petals and have a very short vase life. If you want it to look pretty, an option is to plant twice as many flowers as you think you will need and allow some to bloom and look pretty. However, money for seeds and flower space often isn’t unlimited for most people.
In this post, I will cover the six flowers I recommend planting in my e-book. Again, there are many more details about everything else in the book, but I’ll touch on the basics in this episode. All of these flowers love the sun. Ideally, they should have full sun or mostly sunny conditions. It can have some morning shade or late afternoon, but ideally, during peak summer, they should have at least eight hours of sun per day. Six or seven is probably fine, but the sunnier, the better for these flowers. My book has a labeled diagram showing you where north is. This is because I want you to plant the sunflowers where the tallest plants won’t cast shade on the shorter plants.
Now, let’s talk about spacing. For the most part, keep it simple and put everything 9” apart except the sunflowers. If you read a seed packet, it will tell you how far apart to put things. I encourage you to ignore them and listen to me instead. This is because they are telling you how much space the plant will take up if you let it. If planting in your landscaping or the edge of your garden simply for looks, you want things to branch out and look full, which is why the packets often recommend 18”. However, this means things will grow sideways and crooked as the stems go outward on the ground. You want everything to compete for sunlight and grow upward. This gives you nice, long stems that look better in a vase.
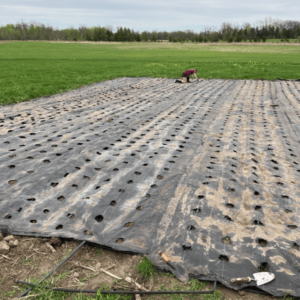
When planting and spacing, I use a propane torch to burn holes into the fabric that I reuse year after year. I go into this with a lot more detail in my e-book, but there are many ways to use landscape fabric. It also keeps weed suppression down. I ordered all of these things from Amazon because shipping is free with Prime, and it can be very expensive for shipping on some of these things. You can probably find them at your local hardware store as well. I use the DeWitt brand of landscape fabric. I find for the fabric, this brand is very durable and lasts a long time, and as I said, it has the 12” lines on it for easy spacing. I buy a huge box of landscape staples, and it lasts many seasons if you’re just starting with a small space. You never want to be a few staples short because that’s when a huge gust of wind will catch it and rip up the entire thing. Once the plants are established, they won’t roll up from the wind as easily, but in the spring, when plants are either just seeds in the ground or tiny seedlings, the fabric can roll up way too easily. I bought this three-pack of mini propane tanks and used this curved dispenser.
Again, with the spacing, I know that the width of my hand is about 5”. I have seen many people make a stencil if their husband is good at welding, or others literally have a ruler out there. When I planted my 500 peonies, I had a yardstick, and the center of each plant would be exactly 3’ apart length-wise and 2’ width-wise. I knew I wanted those plants to be there for decades to come, so I wanted to do them right.
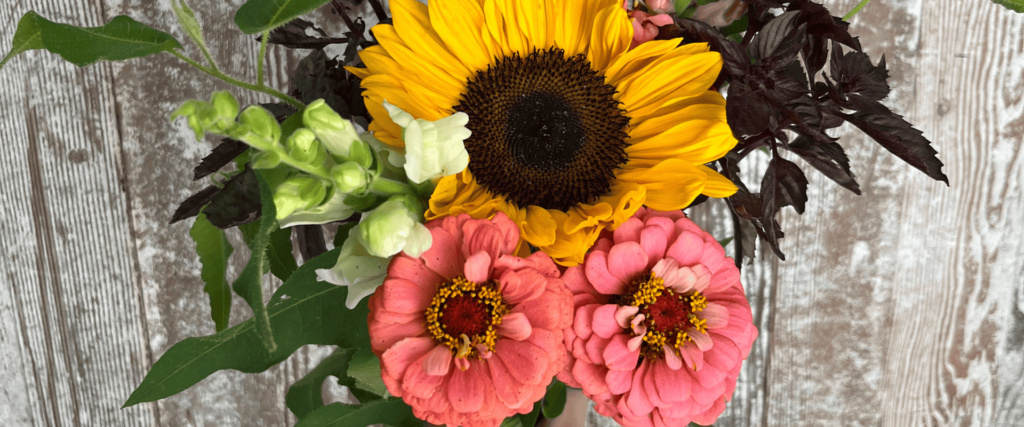
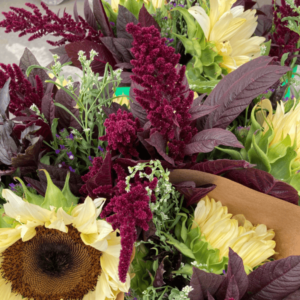
The six flowers include: sunflowers, zinnias, cosmos, basil, cress, and amaranth.
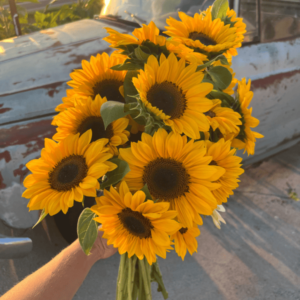
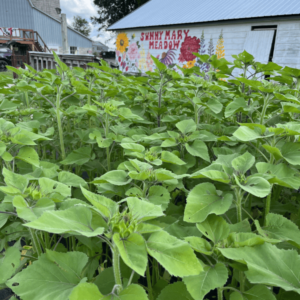
Sunflowers:
Make sure you buy a pollenless variety. If not, they will be a massive broomstick of a stem that will drop pollen all over your dining room table, and you’ll be very mad at me. They have been genetically modified not to drop pollen. They’re also the perfect size for a vase, and there are a lot of unique color variations. I like the ProCut white lite and plum colors, but the orange-gold is pretty much my go-to. I actually found that the ProCut plum has a droopier stem and needs to be strategically placed in a bouquet to hold it up, so I do less of those. But I will still plant a fair amount of them for my wedding this fall because they’re just so pretty – even if they do require a bit of extra work.
The gold lite has yellow in the middle rather than a dark brown/black center, and my customers go pretty crazy over them. They end up measuring about 5” across as well, making them much easier to arrange in a vase. The mammoth sunflowers are always cool at the edge of your garden but are definitely not meant to be used for an arrangement for cut flower purposes.
Again, knowing that some of the varieties have a floppier stem is useful information because I place them either at the base of an arrangement so they can rest on a vase or in the very center so they can be propped up. I don’t like having them for YouPicks or Stem Bars, where customers make their own bouquets, because they get disappointed when they don’t realize the stems require extra support.
I do plant the sunflowers about 4” apart, which is a rare exception when I try to plant most things 9” apart. The 4” encourages everything to reach upward, and the stems cannot get a beefy broomstick-looking stem. Fitting multiple sunflowers into one vase can be very difficult if the stem is so large. I especially love to use mason jars for my bouquets, and I need stem sizes to be manageable. My landscape fabric has 12” lines on it, so I know I can space the proper amount between lines, and then I just eyeball the spacing.

Sunflowers as cut flowers can be tough because people want photos of beautiful sunflower fields. However, if you wait until they are fully open, they are past their prime, and you can’t pick them. They will die within a few days, and the petals will fall off. People always ask me to come to take photos with my sunflowers, but if I let them bloom for photos, they can’t be used in a vase.
I have a dream of turning part of my 23-acre cornfield into a sunflower maze, but it really only blooms for about two weeks and then is ugly after that, so it’s definitely a wasted space.
This cut flower garden can be a little 10’x5’ patch of your current vegetable garden. For example, if you’re in Minnesota, your last frost is about May 15th. These ProCut sunflowers have about 50-60 days to maturity, meaning that’s how long they take to bloom. Knowing that info, I would plant about half of your sunflowers (maybe 30 seeds), and then two weeks later, plant the other 30. This will spread out your bloom time over the summer, and you won’t have them all blooming at once. I do about four successions of sunflower seeds, personally, but again, I’m growing on a much larger scale. I will do an entire episode/blog post about succession planting later this spring.
When I talk about the last frost date, I look at the 10-day forecast when I am going to plant, and sometimes it’s five days before May 15th, or sometimes it’s five days after. That’s the average date for my zip code. Essentially, they just can’t dip down to 32 degrees, but for these little baby seedlings, my comfort zone is 38 degrees because temp predictions can easily be off by five degrees.
Remember that sunflowers are “one and done,” meaning that after you cut them, they won’t produce another flower. That’s why you will want to plant more sunflowers than the rest of these flowers.
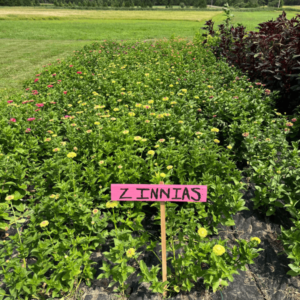
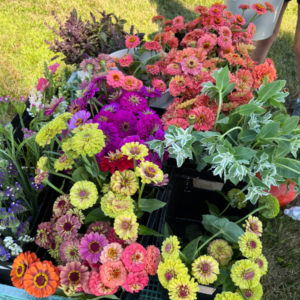
Zinnias:
I will do an entire episode on zinnias because they really are a workhorse cut flower, but for now, I’m going to say you can start with a mixed packet of Benary’s Giant varieties for your first time growing. I don’t personally purchase mixes any longer because it’s hard to sort the colors, but it will be the cheapest way to get started because this is what most stores will have readily available. Again, the Benary’s Giant varieties have sturdy stems and huge blooms.

I discussed this earlier, but your packet is going to suggest 18” spacing. This is if you’re doing it in your landscaping because you want them to look full and bushy. However, as cut flowers, you plan them 9” apart, so they compete with each other for sunlight and grow straight, long stems. You can pinch these, meaning you cut them below the second set of leaves when they’re about a month old, which signals the plant to make more stems. However, this is a bit beyond a novice level, so don’t worry too much about this step if you aren’t ready for it. I think about eight zinnia plants will be plenty of stems for your goal of one to two bouquets a week.
To harvest zinnias, wiggle the stem about 8” below the flower, and if it flops back and forth, it will flop in the vase and needs more time. The nice thing about zinnias is that they need to be fully opened before they are picked, meaning they do look pretty in your cut flower garden.
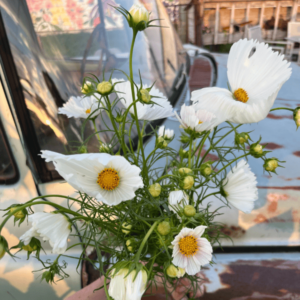
Cosmos:
You will plant these in the ground the same way you plant the zinnias: 9” spacing, directly pop the seeds in the ground and don’t let them freeze. These delicate and dainty-looking flowers don’t ship very well, so many florists won’t sell them unless they have access to a local grower. They add a whimsical little touch to bouquets, and their stems have little lines coming off of them. My best friends call them “Dr. Seuss” flowers. My favorite varieties are double click, versailles, and cupcake cosmos. The cupcake ones literally look like little ribbed cupcake liners. You pick these when they are barely opened. I have used tomato cages to stake these in the past, and I’ve done nothing. I would try a tomato cage if you’re in a windy spot. If not, I think they’ll be fine without it.
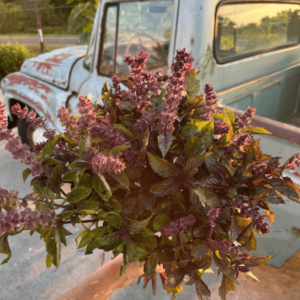
Basil:
Yes, I’m talking about the edible herb basil. I use a variety called Aramatto, which is a beautiful moody purple where the leaf looks a bit like an arrowhead. You’re going plant these with 9” spacing the same way you do the zinnias and cosmos listed above but be aware that they don’t do well with temps below 40 degrees. They also mature early, so I wait until about June 1st to plant these when I know the danger of frost or even chilly spring nights has passed.
Harvesting on these is a bit tricky, and I have done a fair amount of trial and error with them. I wait until the stems are a bit more woody and stiff and some white flower buds appear on the ends. I also put them into warm to hot water when picking for about 10 minutes and then switch to cold water. This keeps them from wilting.
Cress:
I feel like this one will be a bit controversial as starting it at a beginner level, but it’s one of my favorite flowers to make bouquets look wild, whimsical, and airy. You can also direct seed it in the ground, like the rest of these, as opposed to starting flowers in seed trays and having to transplant them. That extra step can be overwhelming for a new or beginner gardener. Once you grow these, you will notice them popping up all over in sidewalk cracks or other accidental places. You pick these when they’re about two-thirds open. You can plant these a bit closer, more like 6”, but the 9” spacing won’t hurt anything. Unlike the above flowers, they are not “cut and come again” and are more of a rosette shape that shoots out stems.
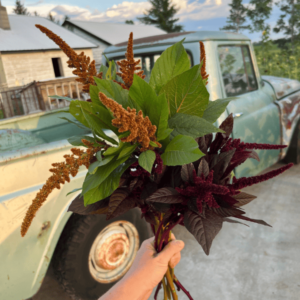
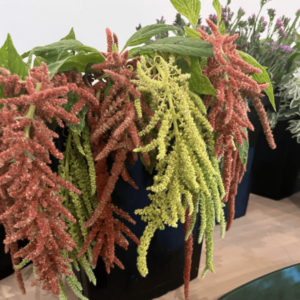
Amaranth:
This flower will be planted like the cosmos, zinnias, and basil – 9” spacing. This is actually a grain. You can eat the leaves the same way you eat spinach. I have a friend from India that actually grows this in his vegetable garden as a stable. I usually wait until they start producing little side stems and pick those because they can be an enormous plant and definitely can’t use the center stem in a normal-sized vase. I love the maroon and bronze colors. Use caution, however, because these can go to seed, and you will end up with little volunteer amaranth everywhere.
Keep listening and reading future posts about harvesting, seed starting, and transplanting, but this is a short and sweet way of getting started by just popping some seeds into the ground and getting your hands dirty.
If you decide to grow a cut flower garden for the first time, I would LOVE to see you tag me on social media @sunnymarymeadow so I can see it!
In addition to the e-book mentioned above on growing your first cut garden from seed, I also have two more e-books on growing perennials in your landscaping that can double as cut flowers and a guide to arranging a bouquet.
I wrote this e-book through a partnership with a local women’s owned publishing company that collaborates with people in the industry to create “e-books with influence.” I think the term influencer gets a negative reputation, but they essentially partner with business owners in specific industries to write e-books. There are many how-to books covering tops everywhere, from a detailed plan on how to declutter your house, the best hiking trails in Alaska from an insider, and even an e-book on how to get sober. They offer e-books on how to build a custom closet for beginners and how to epoxy your countertop to look like marble. I would love nothing more than for their publishing company to sell a million copies; they genuinely are wonderfully hard-working women. Here is a link to their site and all they do.
If you like what you’re hearing, please subscribe and rate us. You can also find us on Instagram, Pinterest, and Facebook.
You can subscribe to our email newsletter below. We love to hear any podcast-related feedback at our email podcast@sunnymarymeadow.com, and all other inquiries can be sent to liz@sunnymarymeadow.com.